The illustration below shows how a diamond is properly set.
The following illustrations depict the steps involved in prong setting a diamond.

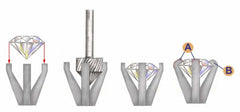
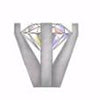
Crown Selection:
The jeweler begins by first selecting a crown that perfectly fits the height and width of your diamond. The prongs of the new crown should overlap your diamond by a third to half of the prong width.
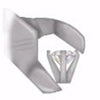
Cutting the seats:
"Seats" are notches in the prongs that your diamond will sit in. It is very important that the seats be cut level and cleanly if your diamond is to be held securely in the prongs.
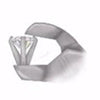
Final Setting:
Once all the seats have been cut, your diamond is fitted in the new crown. The diamond must contact each seat without gapping. Once the fit is perfect, the diamond is removed and the prongs are polished to a mirror finish.
After the final setting:
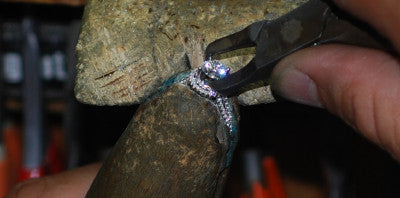
Tightening:
Specially designed pliers are then used to pinch your prongs over your diamond. Even though diamonds are nature's hardest substance the jeweler must still be extremely careful, a false move could damage the diamond.
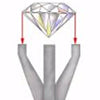
Pulling the prongs:
Once the prong has been pinched over the diamond it is then pulled down onto the stone. Pulling a prong down onto the diamond, rather than rolling it over the stone, helps to lessen the pressure on your diamond.
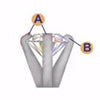
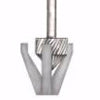
Finishing the prong:
The prong tips must now be filed, shaped and polished.
- The dotted lines on the two rough prongs indicate the desired shape of the new prong.
- The prong on the right has been finished to its final form. The prong should fit your diamond snuggly.